In this guide, I’ll take you through my journey of creating cheap burr baskets. From how I first encountered the idea to finding the best materials, crafting the baskets, and making sure they don’t break the bank, this guide will help you create a beautiful and functional basket on a budget.

Why Make a Burr Basket?
The Benefits of Crafting Your Own Basket
- Cost-Effective: Buying pre-made baskets can be expensive, especially for large, durable ones. A burr basket can be made using inexpensive materials, sometimes even free if you’re foraging for the burrs yourself.
- Eco-Friendly: Recycling natural materials like burrs reduces waste. You’re making use of something that would otherwise be discarded.
- Customization: You get full creative control over the size, shape, and design of your basket. No need to compromise on style or functionality.
- Therapeutic Crafting: Basket weaving is a relaxing and mindful activity, and creating something from scratch is incredibly rewarding.
Materials You Need for Cheap Burr Baskets

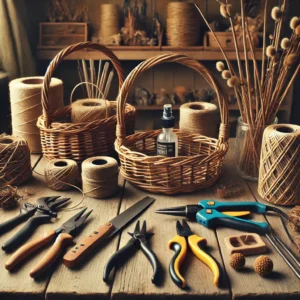
Essential Supplies for Crafting a Burr Basket
- Burrs: This is the main material, and it’s likely the most abundant (and free) resource if you’re living near fields, forests, or rural areas. You don’t need to collect hundreds—just enough to make a good-sized weave.
- Natural Fibers: If you want a sturdy and flexible base, look for twine, jute, or hemp. These can often be found cheaply at your local craft store or online. If you’re really on a budget, even old rope or fabric scraps can work.
- Wooden Twigs or Branches: These will help you create the frame for your basket. Make sure to choose thin, pliable branches like willow or bamboo that can be easily bent without snapping.
- Glue: A hot glue gun is your best friend for sticking the burrs onto your frame. If you’re looking for an eco-friendly alternative, try a non-toxic wood glue.
- Scissors and Pliers: For cutting and shaping your materials. You can also use needle-nose pliers for working with small or delicate elements like burrs.
- Decorative Elements (Optional): If you want to get a little fancy, adding ribbon, fabric, or even beads can give your basket a personal touch.
Optional but Helpful Tools
- Basket Mold: You don’t necessarily need one, but using an existing basket or mold can help shape your burr basket into the perfect size and form.
- Dye: If you want to color your twigs or add some pop to your burrs, non-toxic dyes can make your basket even more unique.
How to Make a Cheap Burr Basket: Step-by-Step
Now that you have your materials, let’s dive into the process. Follow these simple steps to create a beautiful and durable burr basket on a budget.
Step 1: Prepare Your Frame

Choosing the Right Twigs
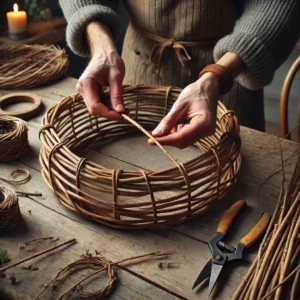
- Start by selecting long, thin twigs or branches. Willow and bamboo are ideal because they’re flexible, but you can use almost any pliable wood. Look for branches that are about the thickness of a pencil.
Shaping the Frame
- Cut the twigs to the length you need for the base and sides of the basket. Aim for 8-10 pieces, depending on how big you want your basket to be.
- Create the circular base by bending one twig into a loop and securing the ends together using glue. Make sure the circle is tight and the ends are firmly fixed.
Building the Walls
- For the sides, take your remaining twigs and start weaving them vertically into the circular base. Push each piece into the circle until the entire frame has a solid base and sturdy sides. You can overlap them or create a crisscross pattern for a more intricate design.
- You’ll want to secure the vertical twigs in place with glue every few rows to ensure they stay put.
Step 2: Attach the Burrs

Preparing the Burrs
- Before attaching the burrs, give them a quick rinse and let them dry completely. Burrs can be a bit prickly, so be cautious when handling them. Wearing gloves will protect your hands and make this process easier.
Gluing the Burrs
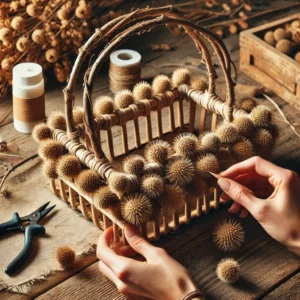
- Once the frame is set, start gluing the burrs one by one onto the frame. You can arrange them in patterns or scatter them evenly, depending on the look you’re going for.
- For a sturdy finish, add a row of burrs along the base and around the sides. Ensure that the burrs are glued tightly so they won’t fall off after use.
Layering for Stability
- If you want a denser, more durable basket, add more layers of burrs. You can use glue to stick multiple burrs together, creating a solid, multi-layer effect.
Step 3: Add the Handles

Creating Handles
- To make handles, take two pieces of twine or wire and attach them securely to the sides of your basket using glue. You can also use the same twigs that you used for the frame, bending them into handles and securing them with twine.
Reinforce the Handles
- If you’re using twine, weave it around the base of the handles for added strength. Ensure that the handles are firmly attached and can support the weight of the contents you’ll be carrying.
Step 4: Final Touches

Trim and Shape
- Once the glue has dried, trim off any excess twigs or burrs that are sticking out. This will give your basket a clean, finished look.
- If you want a more polished appearance, lightly sand the twigs to smooth out any rough edges.
Decoration (Optional)
- For a personal touch, add decorative elements like colored fabric, beads, or a custom tag. You can wrap the handles in fabric or twine for extra flair.
Step 5: Let It Dry
Allow your burr basket to dry completely before using it. This will ensure that all the glue and materials set, and your basket is ready for action.
Where to Use Your Burr Basket
Practical Uses for Your DIY Burr Basket
- Collecting Wild Berries: If you’re foraging, a burr basket is a great way to collect your bounty. The sturdy frame and natural fibers make it perfect for carrying your finds.
- Garden Tool Storage: Use it to store smaller tools like hand trowels, gloves, or seed packets. The basket’s natural look blends well with outdoor spaces.
- Decorative Piece: Set it on a shelf or hang it in a corner as a rustic decor item. You can even use it as a planter for herbs or flowers.
- Craft Storage: Use the basket for storing craft supplies like yarn, scissors, or threads. It’s both functional and charming.
Tips to Keep Costs Down
- Forage for Materials: Burrs and twigs can often be found for free in your local environment. Check parks, fields, or your backyard to gather materials.
- Repurpose Old Items: If you have old twine, fabric scraps, or ropes lying around, use them instead of purchasing new materials. Recycling your household items not only saves money but is also eco-friendly.
- Buy in Bulk: If you need to purchase materials like twine or glue, buying in bulk or from discount stores can help keep costs down.
How to Avoid Over-Spending in Future Basket Projects
- Plan Ahead: Don’t rush into buying materials. Take the time to gather and plan your project to ensure you only buy what you need.
- DIY Your Tools: If you don’t have the right tools, consider DIY options. For instance, a homemade mold or even a plastic container can help shape your basket without buying a mold.
- Look for Sales and Discounts: Craft stores often have sales, and you can score some great deals on twine, glue, or other materials if you keep an eye on discounts.
Creating a burr basket on a budget is both an enjoyable and rewarding experience. Not only do you get a beautiful, functional piece, but you also learn a valuable craft. With a little time, creativity, and the right materials, you’ll have a one-of-a-kind basket that’s as practical as it is charming!
