When the holiday season approaches, the charm of handmade Christmas cards is unmatched. While the traditional designs are lovely, there’s something especially magical about creating your own watercolor Christmas cards. If you’ve never ventured into watercolor or want to try new techniques, this guide will take you through various ideas, giving you everything you need to create cards that radiate warmth, joy, and festive cheer.

I’m here to share the tips, tricks, and ideas that will help you craft one-of-a-kind Christmas cards using watercolors. Whether you’re a seasoned artist or a beginner, I’ll break down each step so you can feel confident in your creations. So, let’s get started and make this Christmas season even more special!
1. Classic Christmas Tree Design

Why It Works:
The Christmas tree is a timeless symbol of the holiday season, making it the perfect subject for a watercolor card. The beauty of watercolor allows for soft, glowing effects that can mimic the twinkling lights on a tree.
How to Create It:
- Sketch the Tree: Start with a light pencil sketch of a triangular tree shape, with branches gently sloping down.
- Add Color: Use varying shades of green for the tree. For a more dynamic look, blend darker greens at the base and lighter ones near the top.
- Decorate with Lights: Create tiny circles or dots in bright colors (red, gold, blue, or white) to represent ornaments or lights. You can add a few glimmers with a white gel pen after the watercolor dries for a “twinkling” effect.
- Final Touches: Add a star or angel on top using gold or yellow for a beautiful finishing touch.
Pro Tip: Try painting the background in soft washes of blue or purple to create a wintery night sky.
2. Snowy Landscape Scene

Why It Works:
Watercolors lend themselves perfectly to depicting snow, fog, and the soft, serene feel of winter landscapes. A snowy scene can evoke feelings of peace and tranquility that make the holiday season feel even more magical.
How to Create It:
- Background First: Begin by wetting the entire card or the area you want the snowy sky to cover. Then, apply a light wash of soft blue or purple to create the illusion of a wintery evening sky.
- Layering Snow: For the snow, start with a wet-on-wet technique—apply a thin layer of water and then a lighter wash of white or light gray. Let it blend naturally into the background for a soft, snowy effect.
- Add Details: Paint small, delicate tree branches in dark brown or black, using a fine-tipped brush to give depth to the scene. Snowflakes can be added using a white gel pen or by lifting off some of the paint while it’s still wet for a textured look.
- Optional Additions: Add a little cottage or deer in the foreground using darker tones for contrast.
Pro Tip: To enhance the effect of falling snow, use a splattering technique with a toothbrush to create tiny white droplets across your card.
3. Festive Wreath Design

Why It Works:
A wreath is another classic Christmas symbol that conveys warmth, love, and welcoming vibes. With watercolor, you can create a soft, flowing wreath with elegant touches of color that seem to glow.
How to Create It:
- Draw the Shape: Lightly sketch a circular wreath shape in the center of the card.
- Paint the Leaves: Use a variety of greens for the leaves. Start with dark greens for the outer edges and lighter greens toward the center. Layer the colors to add depth.
- Add Accents: Use red for holly berries or ribbons. For a touch of sparkle, you can add gold accents on some of the leaves or berries.
- Final Touches: Add small gold or silver dots for a festive, shimmering effect.
Pro Tip: To give your wreath a more dynamic look, vary the size and angle of the leaves, and use a mix of darker and lighter shades for depth.
4. Santa’s Sleigh and Reindeer

Why It Works:
Santa’s sleigh and reindeer are perhaps one of the most magical symbols of Christmas. Watercolor helps capture the dreamy, whimsical quality of the sleigh flying through the night sky, which adds a sense of wonder to your card.
How to Create It:
- Light Pencil Sketch: Start by sketching Santa’s sleigh and reindeer in a loose, whimsical style. You can make the sleigh red or gold, and the reindeer can be painted with shades of brown.
- Sky Background: Use dark blues or purples for the night sky, blending them to create a gradient from top to bottom.
- Add Stars: Add splatters of white watercolor for stars in the sky, or use a white gel pen for little twinkling stars.
- Highlights: Use a bit of yellow or orange around the sleigh and reindeer to create a glowing effect, as if they’re lit by the moon or magical lights.
Pro Tip: To create motion, paint the reindeer in slightly different poses, making it seem like they’re in mid-flight.
5. Holiday Floral Arrangements
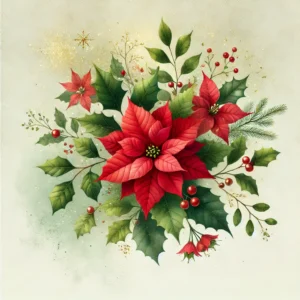
Why It Works:
For a more elegant approach to Christmas, floral designs like poinsettias or holly can be incredibly beautiful and refined. Watercolor allows you to achieve that delicate, soft feel that floral cards often convey.
How to Create It:
- Light Sketching: Start by lightly sketching your flower arrangement (poinsettias, holly, or mistletoe) in the corner or center of the card.
- Layer the Florals: For poinsettias, use bright red for the petals, and for the leaves, use deep green with a bit of yellow. Blend colors lightly to give a soft look.
- Add Berries: Tiny clusters of red or white berries can be added to fill out the arrangement, bringing in holiday colors.
- Background Color: For the background, a wash of soft gold or even a gentle light pink can make the florals pop without overpowering them.
Pro Tip: Experiment with masking fluid to protect the white areas of the paper (like the centers of the flowers or berries) before you begin painting.
6. Winter Animals
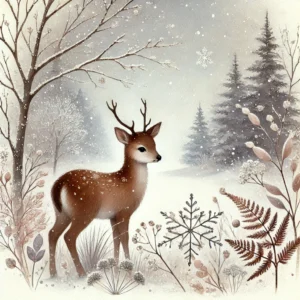
Why It Works:
Adding animals to your Christmas card design brings an extra layer of warmth and charm. Whether it’s a curious fox in the snow or a deer in a forest, watercolor can really bring these animals to life.
How to Create It:
- Choose Your Animal: Decide whether you want a deer, a fox, or even a polar bear. Sketch lightly in the center of the card.
- Paint the Animal: Use earthy tones like browns and oranges for the fur, and give the animal’s eyes a subtle highlight to create life.
- Wintery Background: For the backdrop, paint a soft snowy ground beneath the animal and light snowfall in the background.
- Add Little Details: Tiny snowflakes, leaves, or branches can be added to fill the space and make the scene look natural.
Pro Tip: Using a wet-on-dry technique helps keep the details of your animal sharp, which is essential for capturing realistic fur or texture.
7. Christmas Stockings

Why It Works:
Christmas stockings are synonymous with the magic of the holiday season. Watercolor gives you the freedom to create the texture and warmth of the stockings while adding fun patterns and little surprises inside them.
How to Create It:
- Sketch the Stocking: Lightly draw the outline of a stocking on your card.
- Add Details: You can fill the stocking with various items like toys, candy canes, or gifts. Use bright colors like red, green, and gold for the stocking itself.
- Textures and Accents: Add some shading to create depth, and use gold or silver to highlight certain areas of the gifts or the trim of the stocking.
- Background: A soft wash of snow or a faint pine tree in the background can tie the design together.
Pro Tip: To make the stocking stand out, use darker tones in the background, so the stocking appears brighter and more focal.
Final Thoughts
Watercolor Christmas cards allow you to infuse each one with a personal touch, making them a delightful and meaningful gift in themselves. Whether you’re creating a classic tree design, a peaceful snowy scene, or a whimsical sleigh ride, there are endless possibilities. And the best part? Watercolor makes even the simplest designs feel special with its soft, fluid nature.
By following these ideas, you’ll not only create stunning cards for your friends and family but also make memories that will last a lifetime. Happy painting, and Merry Christmas!
