As winter sets in, it’s the perfect time to bring some cozy crafts into the classroom or home! These winter-themed crafts are perfect for elementary-aged kids, keeping little hands busy and fostering creativity. Here are some simple and fun ideas, with step-by-step instructions to make crafting a breeze.
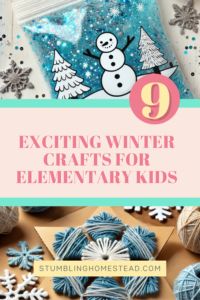
1. Paper Snowflakes
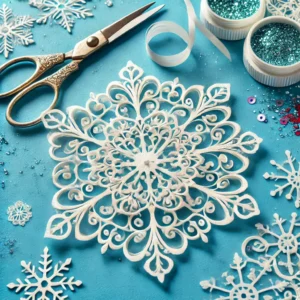
- Supplies: White paper, scissors, optional glitter
- Instructions: Fold a square piece of paper in half, then in quarters, and cut out designs along the folds. Unfold to reveal a beautiful, unique snowflake. Add glitter to give it a frosty look!
- Tip: Experiment with different folding techniques for unique patterns.
2. Snowman Sock Puppets
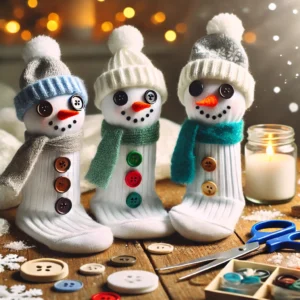
- Supplies: White sock, buttons, felt, fabric glue, pom-poms, markers
- Instructions: Fill a white sock with rice or cotton balls to create a base. Tie off sections to create a head and body, then glue on buttons, felt eyes, and a small carrot nose. Add a pom-pom hat for extra warmth.
- Tip: Have kids personalize their snowmen with mini scarves or hats made from scrap fabric.
3. Pine Cone Bird Feeders

- Supplies: Pine cones, peanut butter (or sunflower butter for allergies), birdseed, string
- Instructions: Spread peanut butter over a pine cone, roll it in birdseed, and tie a string around the top. Hang outside for birds to enjoy!
- Tip: This is a great opportunity to talk about how animals adapt in winter.
4. Snow Globe Jars

- Supplies: Small jar, figurine or mini tree, glue, glitter, water
- Instructions: Glue a small figurine or tree to the jar lid, let it dry, then fill the jar with water and glitter. Close the lid tightly and shake!
- Tip: Adding a drop of glycerin to the water makes the glitter fall more slowly, like real snow.
5. Cotton Ball Penguins
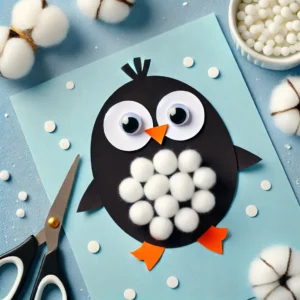
- Supplies: Black construction paper, cotton balls, googly eyes, orange paper
- Instructions: Cut a black paper oval for the penguin’s body and smaller pieces for wings. Glue cotton balls to the center for the penguin’s fluffy belly, add googly eyes, and finish with an orange beak and feet.
- Tip: Use cotton swabs for a fun “snowy” background on blue paper.
6. Popsicle Stick Snowflakes
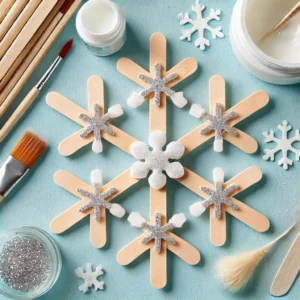
- Supplies: Popsicle sticks, glue, paint, glitter, ribbon
- Instructions: Glue three or four popsicle sticks into a snowflake shape. Paint them white or blue, add glitter, and tie a ribbon on top for hanging.
- Tip: Use various sizes of popsicle sticks for larger or smaller snowflakes.
7. Mitten Garland
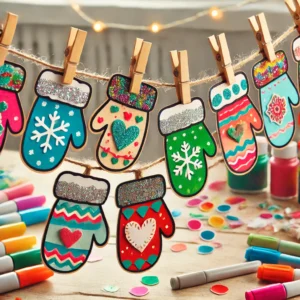
- Supplies: Construction paper, markers, string, clothespins
- Instructions: Trace and cut out mitten shapes from construction paper. Let kids decorate each mitten with markers, glitter, and stickers. Then hang the mittens on a string with clothespins for a cute winter garland.
- Tip: This is a fun way to teach about symmetry by having kids design matching mittens!
8. Painted Snowy Pine Trees
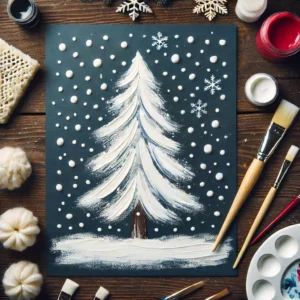
- Supplies: Dark blue construction paper, white paint, small brushes or sponges
- Instructions: Have kids dip brushes or sponges in white paint to create snowy pine trees on the paper. Add white dots for falling snow. Let dry for a beautiful winter scene.
- Tip: For added dimension, use different shades of green or white to create depth in the “forest.”
9. Winter Candle Holders

- Supplies: Small glass jars, glue, Epsom salt, twine, tea lights
- Instructions: Brush glue around the outside of a jar, then roll it in Epsom salt for a frosty effect. Once dry, tie a piece of twine around the jar’s rim and add a tea light inside.
- Tip: Battery-operated tea lights work great for a kid-safe glow.
10. Handprint Polar Bears
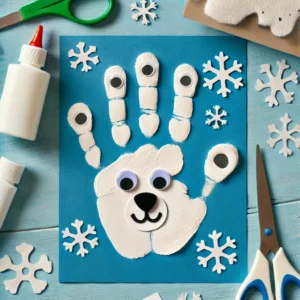
- Supplies: White and blue paper, black marker, glue, googly eyes
- Instructions: Trace kids’ hands on white paper, cut them out, and glue them onto blue paper for the polar bear’s body. Add googly eyes and a small nose at the top of the handprint to create a cute bear face.
- Tip: Make this craft extra special by adding a wintery background with snowflakes or glitter.
These crafts are easy, low-cost, and a wonderful way to explore winter themes with kids.
